Thursday, December 20, 2012

Countdown to Christmas, Snowman Theme


Welcome to theme day thursday with My Cricut Craft Room!
The theme of the day is Snowman :))
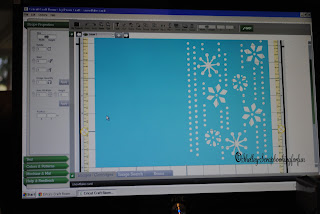
Here are my Cricut Craft Rooms screen shots!


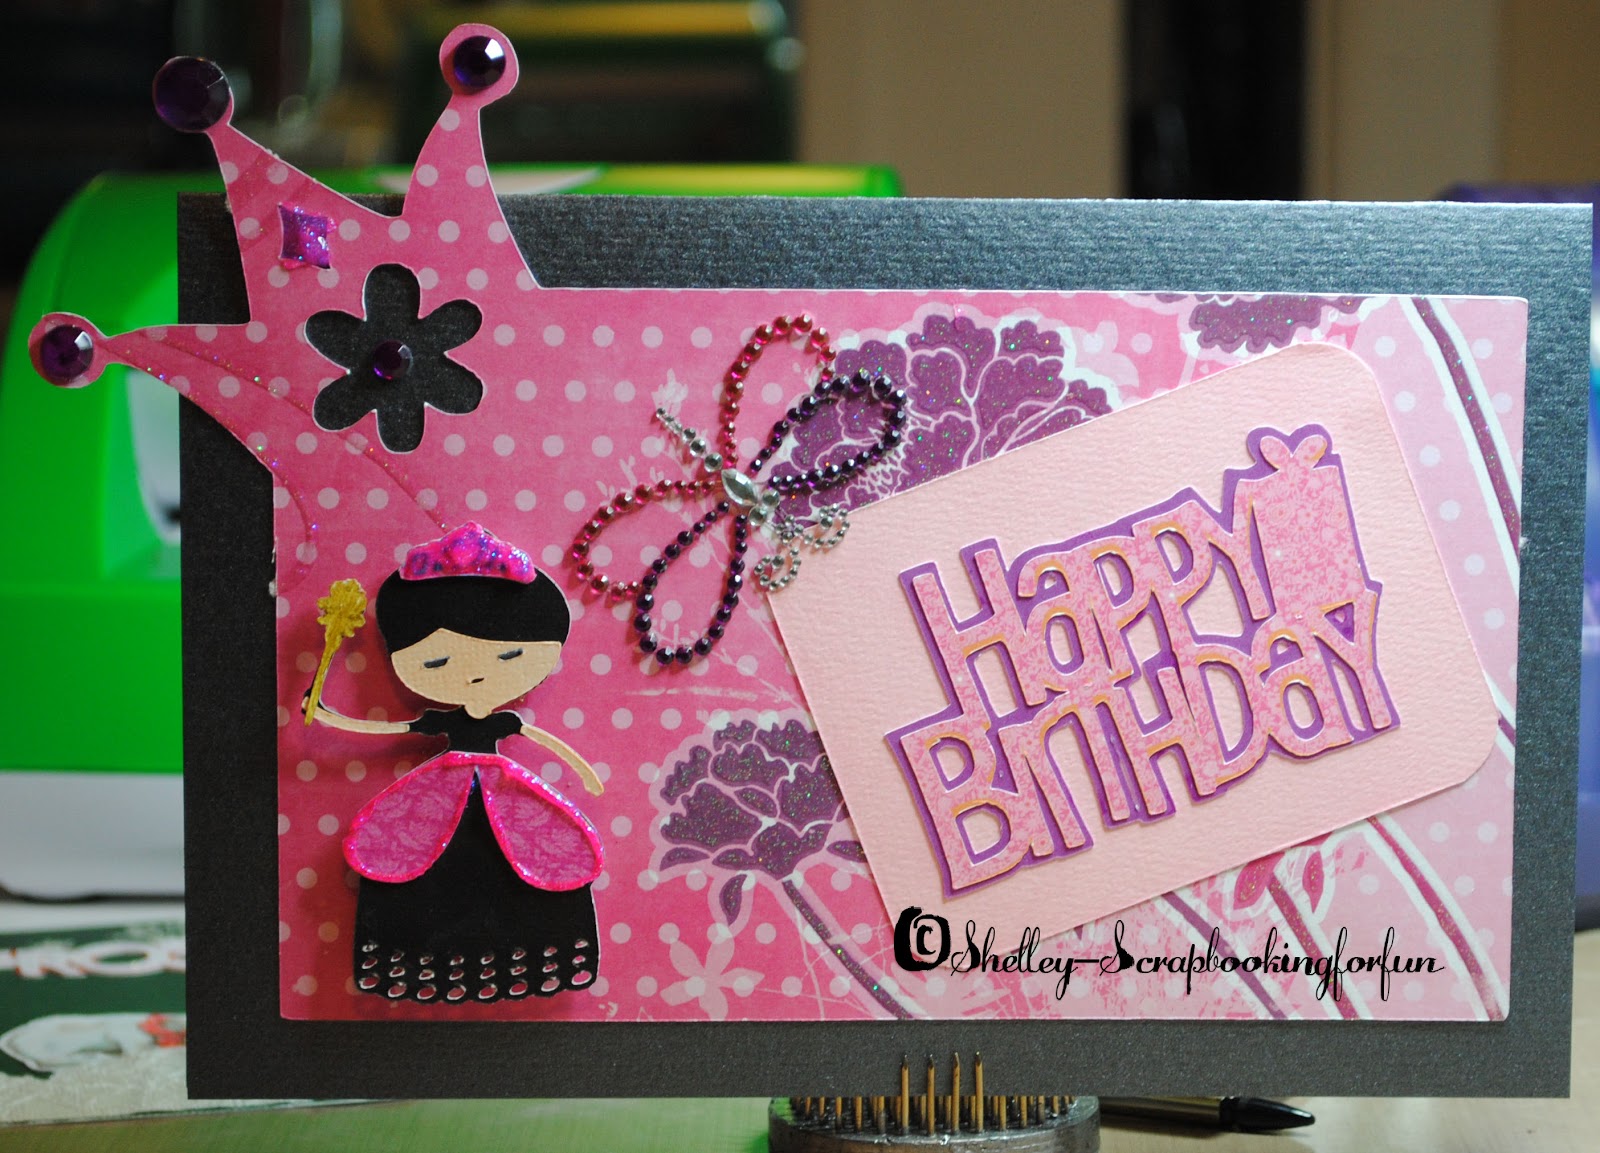
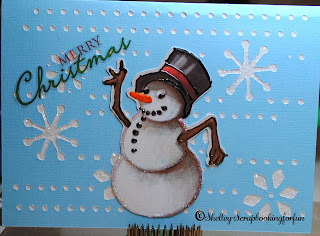
This is the completed card:)

On this Card I used a craftroom exclusive card and it was Card 1 and I cut it at 7.50 inches.
I then used Santa's Village to cut the Snowman.
I took a white cardstock and ran it through my Creative Station and attached it to the inside of the blue card sticky side up. I then sprinkled glitter and patted it down and gently shook the excess off! It is hard to see but it worked great on the snowflakes. I then attached the snowman and he was cut at 4 inches. I used Liquid pearls to add a little dimention to him. The Merry Christmas is a sticker. Craft Room has some amazing individual cuts for the Imagine and Expression and they are really affordable!
Be sure to go back to My Cricut Craft Room to see what my design team sisters have for you.
This will be my last December post for MCCR so
Happy Ho;lidays!!!!

Monday, December 17, 2012

My IMAGINE-ation Monday Santa theme


Welcome to My Cricut Craft Rooms Santa themed Imagination Monday!!!
I have 2 Santa cards for you today but first you will see the screen shot in Cricut Craftroom.


I design all of my projects in Craft Room and would be lost without it. When it is down for any reason I come unglued:) No pun intended. Put it down to lack of sleep! Tis the season and I work in retail so I am always tired!!
On both of the Santa cards I started by embossing the card with a cuutlebug snowflake embossing folder.
The cuts are from Imagine cartridge Santa's village and the cuts were done at 4 inches. The Happy Holidays and Wishing you joy are stickers and not cricut cuts. The Naughty or Nice is a cricut cut. I did outline some areas with Liquid pearls. I love this Cartridge for Christmas projects!!!
Be sure to go back to My Cricut Craft Room to see all the great projects my Design Team Sisters have for you!!!


Saturday, December 15, 2012

Shrooms and Blooms Blog Hop!

Welcome to the Shrooms and Blooms Blog Hop!


If you arrived here from Angela's Blog, then you are on the right track! If you just stopped by and would like to start at the beginning, please go to Jenn's Blog.

 We are so happy to have you join us today! You won't want to miss out on any of these whimsical mushroom projects!

One grand prize winner will win a the goodies pictured at your first stop Jenn's Blog)! Please be a follower and leave a comment at all of the stops in the hop for the chance to win. There will also be other blog candy along the way! Make sure you return to Jenn's Blog and link up to be in the drawing for the goodies :)


All of my cuts were done in Cricut Craft Room and were cut with my Imagine machine.
The cartridge used was Imagine Nursery Tales. I added liquid pearls and Glitter to make it pop:)) Now here is the full line up!!
  1. Jenn http://scraphappensembellishit.blogspot.com/    start here
  2. Heather http://heathernovinger.blogspot.com/
  3. Angela http://angelascraftyspot.blogspot.com/
  4. Shelley http://shelley-scrapbookingforfun.blogspot.com/
  5. Tara http://craftindesertdivas.blogspot.com/
  6. Tammy http://cuttinandstampin.blogspot.com/
  7. An'Jenic /http://anjenicgibson.blogspot.com/
  8. Norma http://lilhoneybeestudios.blogspot.com/
  9. Kim http://rydenkim.blogspot.com/
  10. Tess http://sassycricutcrafting.com/
  11.  Robin http://cutonedesignsbyrobin.blogspot.com/
  12.  Melissa http://mywatermelonmoon.com
  13. Jennie http://jenscrapstoo.blogspot.com/
  14. Jenn http://scraphappensembellishit.blogspot.com/     blog candy link up

Wednesday, December 12, 2012

Bippity Boppity Boo Pretty Little Princess Blog Hop


Welcome to My Cricut Craft Rooms
 Bippity Boppity Boo Pretty Little Princess Blog Hop
First I am going to show you the Craft Rooms Screen Shots of my Projects:)


Now on this project I used Princess Party and Imagine Cartridge Berries and Cream.
The princess was cut in layers and the size was set at 3 inches. You can see the layers in the first picture.
The cute crown card base was cut at 6 inches on a decorative piece of card stock. So I used the cut only feature on my Imagine. Happy birthday was cut at 2 inches and was cut standard and shadow as you can see pictured above. Now here is my finished project and a little more info:)

The second cut I did of the princess I left white and used a copic marker in a flesh tone to color the white card stock. I used Glam pink stickles to color the crown and outline the pink portion of her dress. I used gold stickles to add to the wand. I put the layered Happy Birthday onto a piece of light pink card stock and rounded the edges and placed it at an angle over the bust portion of card stock. I added Rhinestones to the tips of the crown on the card base and added a rhinestone dragonfly. 
Thank-you for stopping by my blog:) Be sure to go back to 
To see the wonderful creations from my talented design team sisters!!!

Thursday, December 6, 2012

Theme Day Thursday with My Cricut Craft Room

 
Welcome to Theme Day Thursday with my Cricut Craft Room!
Today's theme is cold hands warm heart. Now Erica said to get creative with it so I did!! LOL
Below you will see my project in Craft Room
 As you can see I chose polar bears so my project is actually cold paws warm heart :)
I used the following cartridges on this Project.
Imagine cartridge Santa's Village, Winter Woodlands and Victorian Romance.

The frosty Kisses is a cut from Winter Woodland and was cut at 2.00 inches.
The polar bears are from Santa's Village and was cut at 2.00 inches.
The heart is a cut from Victorian Romance and was cut at 1.00 inches.
 I added a holiday stickles to give the lettering sparkle as well as the heart.
I did add stickles glitter glue to the scarves also.
The snow on the ground is a fiberous textured paper that I wish I had more of!
Thank-you for stopping by my blog today! Be sure to go back to My Cricut Craft Room for more great projects!!!

Wednesday, December 5, 2012

WYEGW with My Cricut Craft Room


Welcome to Would you ever guess Wednesday with My Cricut Craft Room!
Todays challenge was to make a coloring page. This was a super easy challenge because Santa's Village which is a Imagine cartridge has 3 black and white pages provided. You can see it in craftroom pictured below.


To get this to fit the page I set it to 11 inches and it was the perfect size.
I then just changed the setting in craftroom to print only. I have to say I love my Imagine machine and am sad to see them discontinued:((( I love to have the ability to print and cut all in one machine.

You could also use this cartridge in your E2 machine and use a cricut marker or gel pen in place of the blade.
Thank-you for stopping by my blog today and be sure to go back to My Cricut Craft Room to see what my DT sisters have created for you!!!

Saturday, December 1, 2012

100 Cartridge Blog Hop with My Cricut Craft Room

Welcome to Erica's Craft Room
100 Cricut Cartridge Blog Hop 


You should have started at http://mycricutcraftroom.blogspot.com/ if not please start at the beginning


You should have come from Jennifer L Blog
Welcome and thank-you for hopping with us today!
I have 2 projects for you. Unfortunately on the first one I don't have a craft room shot. I forgot to save the project before shutting it down:( But here is the pic of my first card.

On this card I used the following cartridges:
Dec 25th
Christmas Wish
Tis the Season
Winter Lace
The scalloped rectangle is from Tis the Season and is cut at 6 inches
The wording is from Dec 25th and is cut at 3.50 inches
The dove is also from Dec 25th and is cut at 2.50 and embossed with a cuttlebug folder.
The snowflakes are from Winter Lace and are cut 1.25 inches.
I used Imagine cartridge Christmas wish to color all of my cuts. I also used Stickles glitter glue and 
Liquid Pearls to to outline items and give a little shimmer.
Next is the screen shot in Cricut Craft Room of my 2nd project


On this card I used the following cartridges:
Imagine Cartridge Enjoy the Seasons
Imagine Cartridge Mr. Frosty
Enjoy the Season is cut at 4 inches
The Ginger bread men and mug are cut at 2 inches.
The white base is embossed with a snowflake cuttlebug folder.
The pattern on the cup, spoon, and border on the enjoy the seasons tag are all a pattern from Mr. Frosty.
Now here is the pic of my finished card.

Next you should go to 
Here is the complete lineup in case you get lost along the way.

I am back :) Here are a few cards that I recently made

After a very long break from blogger due to my blog being a mess when my blog designer quit hosting the blog design. I am back  With a be...